How to mount your Scope. Learn the tips and tricks from our expert Jerimiah Alexander on this episode of Riton University.
Transcript:
Alright guys, Jerimiah with Riton University here to talk to you about mounting your scope to your rifle.
There are a number of things to think about the first one being safety. So again, we’re going to make sure we’re gonna make sure our rifles on safe, our magazine is ejected. I’ll make sure she’s open and clear. So now have a nice clear weapon to start with.
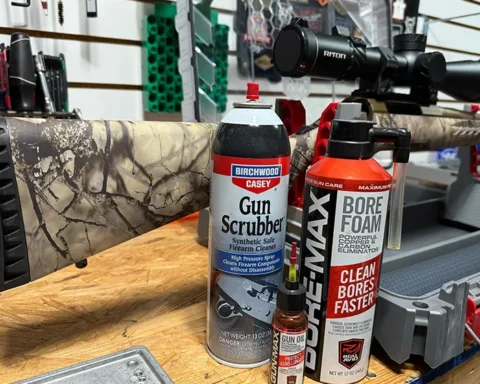
A few things, I like to get all my tools out ahead of time. So I’ve got a 34 millimeter 7 Conquer 3-24×56. So I have matched it with our Contessa by Riton 34 millimeter rings, the height of my rings is important, as we’ll see in a minute with our cheek weld.
But one other thing I like to do right away, is just line up what’s called mounting length, this length in here. This is our mounting length that tells us how much space we have to mount.
Why is this important?
Well, because I need to have an eye relief, meaning my eye needs to sit far enough back from the scope that it makes sense. And the rings need to be as centered as possible here.
One other thing to think about. Usually, this is a problem with gas guns, AR15 type guns. you’ll see that there’s a break in the gun here I have one rail here, and another rail here on the front. I do not want to ever span this gap with my rings. So that’s that’s important because those are are going to be moving possibly at two different times and could be problematic.
So I’ll set my scope here. Basically, I kind of have an idea where my eye relief is. And then I just set my rings out here where I can see where they’re gonna fit nicely and we go.
I have the luxury of having shot this weapon a few times. So I have a pretty good idea where I want my rings.
So the first thing I’ll do, if you haven’t memorized, I count how many rails on my Picatinny there. So I’ll set that on. And then I’ll set this one on. And then again, for I tighten anything too tight. I’ll set my scope in here.
I want to make sure a few things, make sure that my eye relief is good. So I move this back and forth one thing with eye relief too always be on maximum power. So turn your scope all the way up because if you got a good clear picture and good eye relief on high power, you will most definitely have it on low power.
So now I move the scope forward and back until I have that perfect big sight picture for me right about here. So I have that there.
And I’ll tell you I don’t like how far forward this ring is. So what I’m going to do is take it off and just move this ring back a couple spots. One of the reasons I didn’t tighten anything down See there you go. I like my rings to be centered in the possible space that they have there. So back at it again. Oh good eye relief for me.
So I have this setup on the rifle I’m gonna go ahead and torque down the bases which we usually do about 45 inch pounds. With automobiles you hear foot pounds a lot Do not be confused. We use inch pounds, I have a fat wrench Wheeler makes a wrench these are just torque wrenches and what they do is they let you set how many inch pounds that it will stop at and so I will dial this one up, until I get to 45 which is what I gonna do my bases to and what happens is it just won’t let me tighten it any more than 45. That’s a good solid mount so you’ll hear it click here. Same thing here.
So we’ve got those tightened down. Just gonna check one more time.
Yep, I still like when my eye relief is there.
Okay, so now we’ve got our rings mounted to the base of our weapon.
We need to be level guys. So got my two levels here. And why do I have two levels I have two levels because if I just put a level on my scope and level my scope, my scope will be level but if my level rifle wasn’t level or the table that I was on wasn’t level, then my scope will be, it won’t match my weapon.
So you need to two levels one for your your firearm. I stick it just here on the barrel, and then one here on the top of my scope.
So now I have this nice bipod, which is going to let me first level out our rifle. Kind of hard to see. So just a bubble level here. And I’m going to put this Yep, just centered.
So now I know my rifle is level, my scope isn’t level now. So it’s a good thing I used this.
So now I’m gonna just turn my scope until this bubble level is center, which was actually quite a bit of movement. So thank goodness for levels.
So I’ll check them both, they look good eye relief looks good. I’ve tightened my rings down good.
The next thing I will do is put what we call the clam shells at the top of my rings on.
So with all the screws still inserted, I just set it right down on top.
And it’s really important if you can lay out all of your tools ahead of time, it will save you some frustration and the end and definitely save you some time. And I already have my tool out for this your Riton Optics are going to come with whatever tools you might need. And your rings are going to come with whatever tools you might need. So I suggest a torque wrench to make sure that your torque is proper. But you will have all the tools you need to mount up your scope otherwise.
So again, just double triple check in everything else I’m going to hold my scope down and kind of like changing a tire. I’ll tighten this in a star pattern if you will.
So again, I’m not tightening them down very much, I’m just kind of getting them snugged up.
And for our rings up here we suggest anywhere from 15 to 18 inch pounds. So again, I just dial my, my wrench, you can see that or not down to 18 and there’s just a line that indicates where you’re at. Turn it upside down. There we go.
Okay, so And again, I’m not actually using the torque wrench yet, I’m just tightening up my screws. Because I’m gonna recheck everything before I go tightening anything down all the way.
Alright, so I’ve just got those snugged up and I did move my scope a little while I was tightening, so I would just ever so slightly move it back.
Guys take the time to do this right the first time and the whole shooting experience will be better.
I’m level I’m level, I’m going to check I really for more time.
Again, be careful not to move anything. And the idea is that I can just put my head right down, have my eyes open, boom perfect sight picture on full power, which I have.
So again, make sure I’m at that 18 inch pounds. level again. And now I’m gonna go through here and go ahead and tighten these what you’ll have to do is you’ll notice there’s a gap, you can squeeze one side of your ring down. You don’t want to do that you want there to be an equal amount of space between the top and the bottom of the ring on this side and this side. And so I will just watch that as I go and not over tighten one side too much. There we go. You can’t really hear it but if you watch the wrench just there you go. It just clicks and it won’t go any further.
Alright, still looking good. We’ll continue the star pattern. There we go.
One more check levels are good. So my scope is level to, my rifle. Everything set up good. Just one last look. Make sure nothing’s hanging off or weird.
As far as space goes, this is awesome amount of space but I’ve pre measured here. You do not want the objective of your object to be touching the front of your, of your rifle because again there is movement and that can cause a problem.
So you do want at as small a space as possible right to keep a low profile.
But at least you know, a few sheets of paper at a minimum should be able to fit underneath your scope between your scope and your rail.
So this is a nice setup and again, the height of the rings matters. For this cheek well to have an adjustable stock piece here which is kind of nice.
But there it is. Mounted our scope up on our Riton Optics.